Quickly Connect to MCP Services with the CLINE Plugin (Using MCP SQLITE as an Example)
Install VSCODE
Download the vscode installation package from the official website https://code.visualstudio.com/ and install it.
Install CLINE
Find CLINE in the vscode extension list and choose to install it.
Configure CLINE to Use Genesis Cloud QWQ API
1. Click the small robot icon on the left side of VSCODE

2. For first-time use, it will prompt to configure the API for the chatbot. If you have used it before, you can configure it by clicking the settings gear of CLINE.
| Setting | Description |
|---|---|
| API Provider | Select OpenAI Compatible |
| Base url | https://api.modelverse.cn/v1 |
| API key | Obtain it from the Key page in the UModelVerse console - Experience Center |
| Model ID | Qwen/QwQ-32B |
| Model Configuration | Since QWQ is a chain of thought model, select Enable R1 messages format |
| Context Window Size | Limit to 40000 |

3. After configuring, you can proceed with a conversation test
Seeing the reply indicates successful configuration.
Install UV and SQLITE
Windows users run in cmd
winget install --id=astral-sh.uv -e
winget install sqlite.sqlite
Mac users use
brew install uv
brew install sqlite3
Configure CLINE to Use mcp-server-sqlite
Click the small robot icon to open CLINE
Select the small server icon at the top of the page
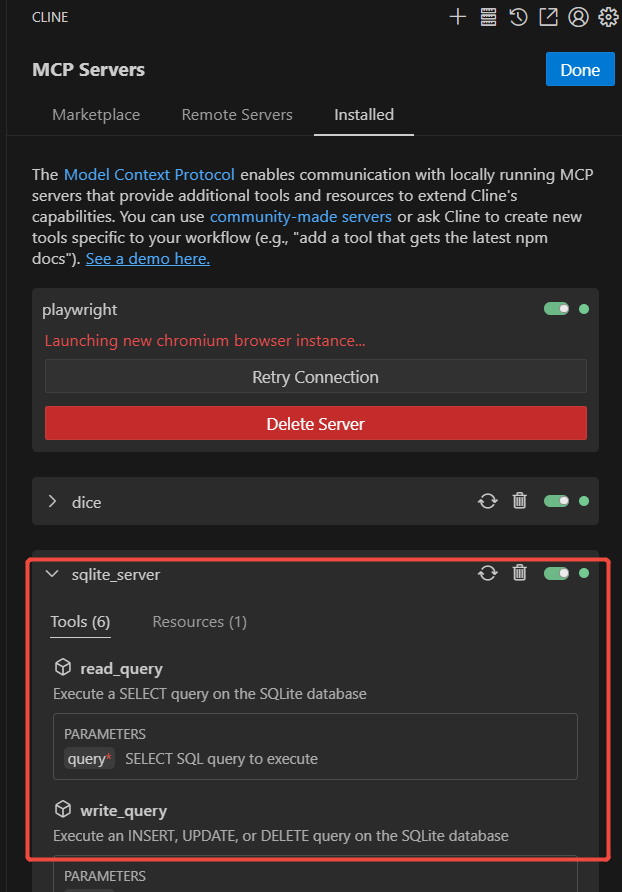
In MCP Servers, select the installed tab, where you will find Configure MCP Servers. Click to open Cline’s MCP configuration file.
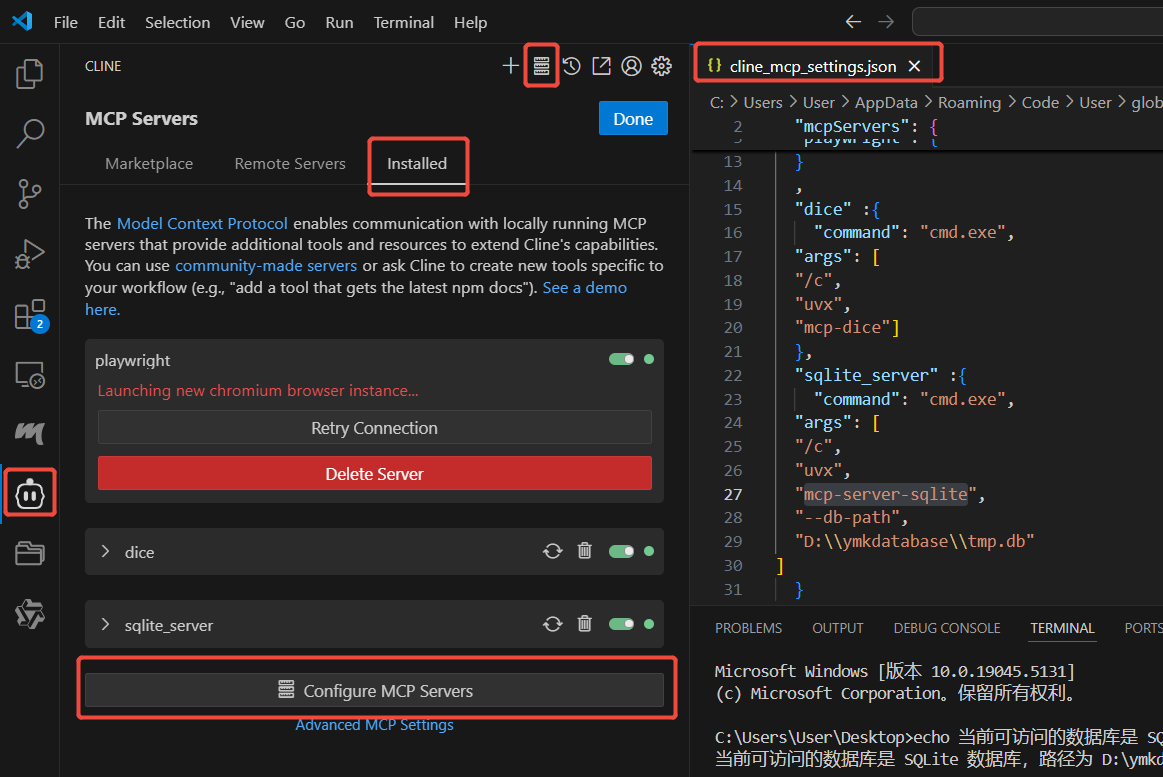
Modify the CLine MCP configuration file.
Windows modification reference:
{
  "mcpServers": {
    "sqlite_server" :{
        "command": "cmd.exe",
      "args": [
      "/c",
      "uvx",
      "mcp-server-sqlite",
      "--db-path",
      "D:\\tmp\\test.db"
    ]
    }
  }
}
Mac modification reference:
{
  "mcpServers": {
    "sqlite_server": {
      "command": "uvx",
      "args": [
        "mcp-server-sqlite",
        "--db-path",
        "/tmp/test.db"
      ]
    }
  }
}
Where “D:\tmp\test.db” and “/tmp/test.db” can be changed to the desired location to store the sqlite database. It can be an existing db file, or it will be automatically created if not existing.
After saving the file, you will be prompted.
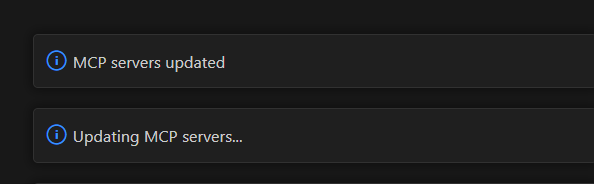
An option tab called sqlite_server will appear under the installed tab, indicating that it is enabled in green status.
Interaction Example
Note ⚠️: The following prompt should be completed within the same conversation without clearing context, or emphasize using sqlite when asking the second time.
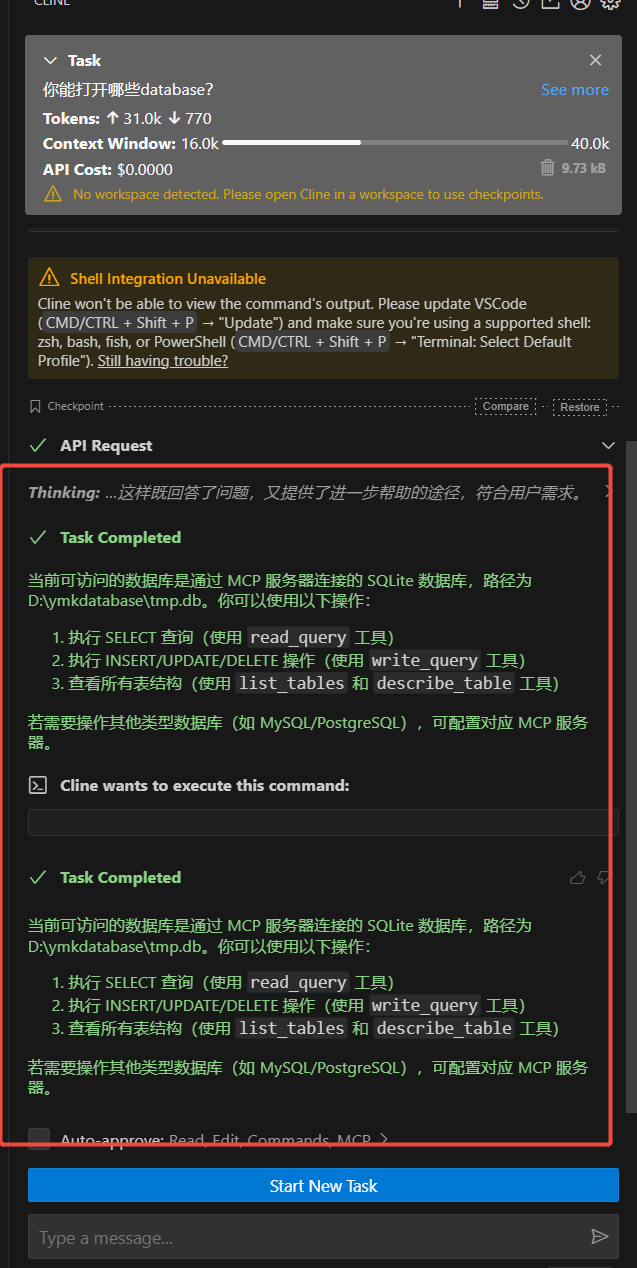
List Databases
Enter the following command in the dialog box and send:
What databases can you open?
The model will return the command needed to be run and ask if you want to run it. Choose to run command or approve to execute it.
A task may involve multiple executions, each of which needs human approval.
If you want the model to fully automate execution, you can configure the auto-approve option, but there will be some security risks.
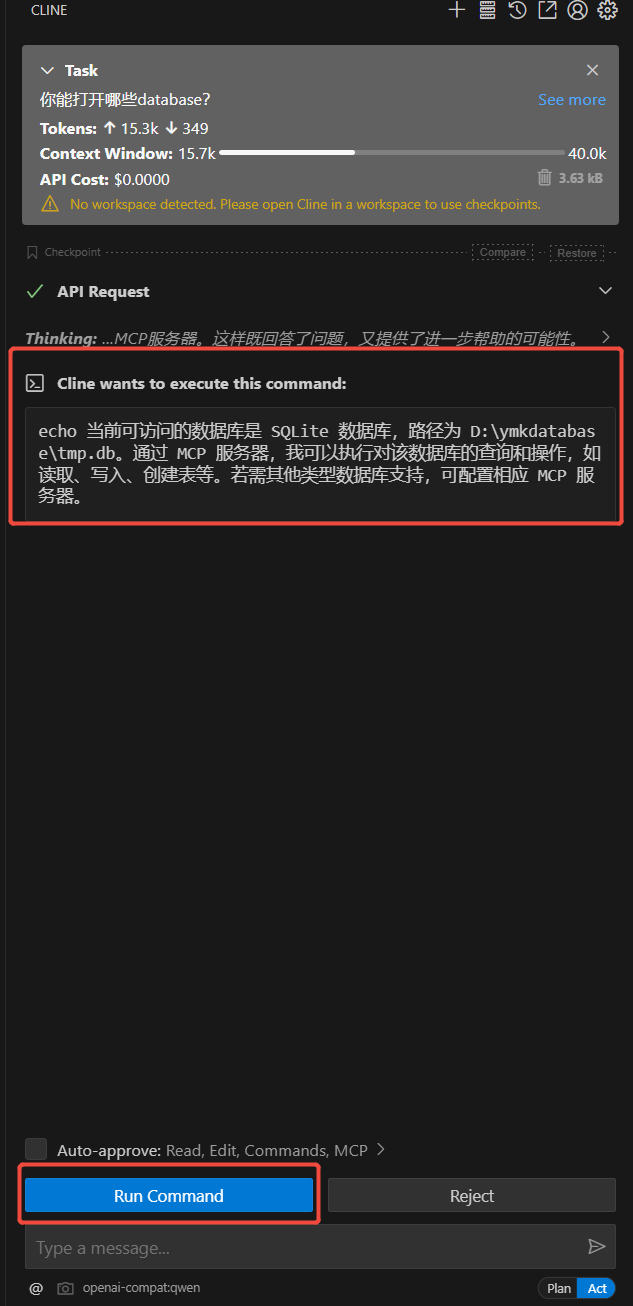
After execution, the following response is received:
Create Table
I need to create a list of employees. It should record the 11-digit employee ID, employee name, employee level, and employee date of entry. Please create it for me.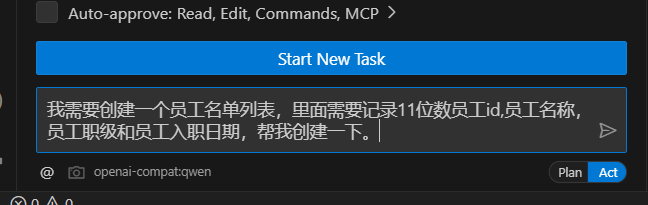
The model requests to execute the command to create the table. Choose to approve.
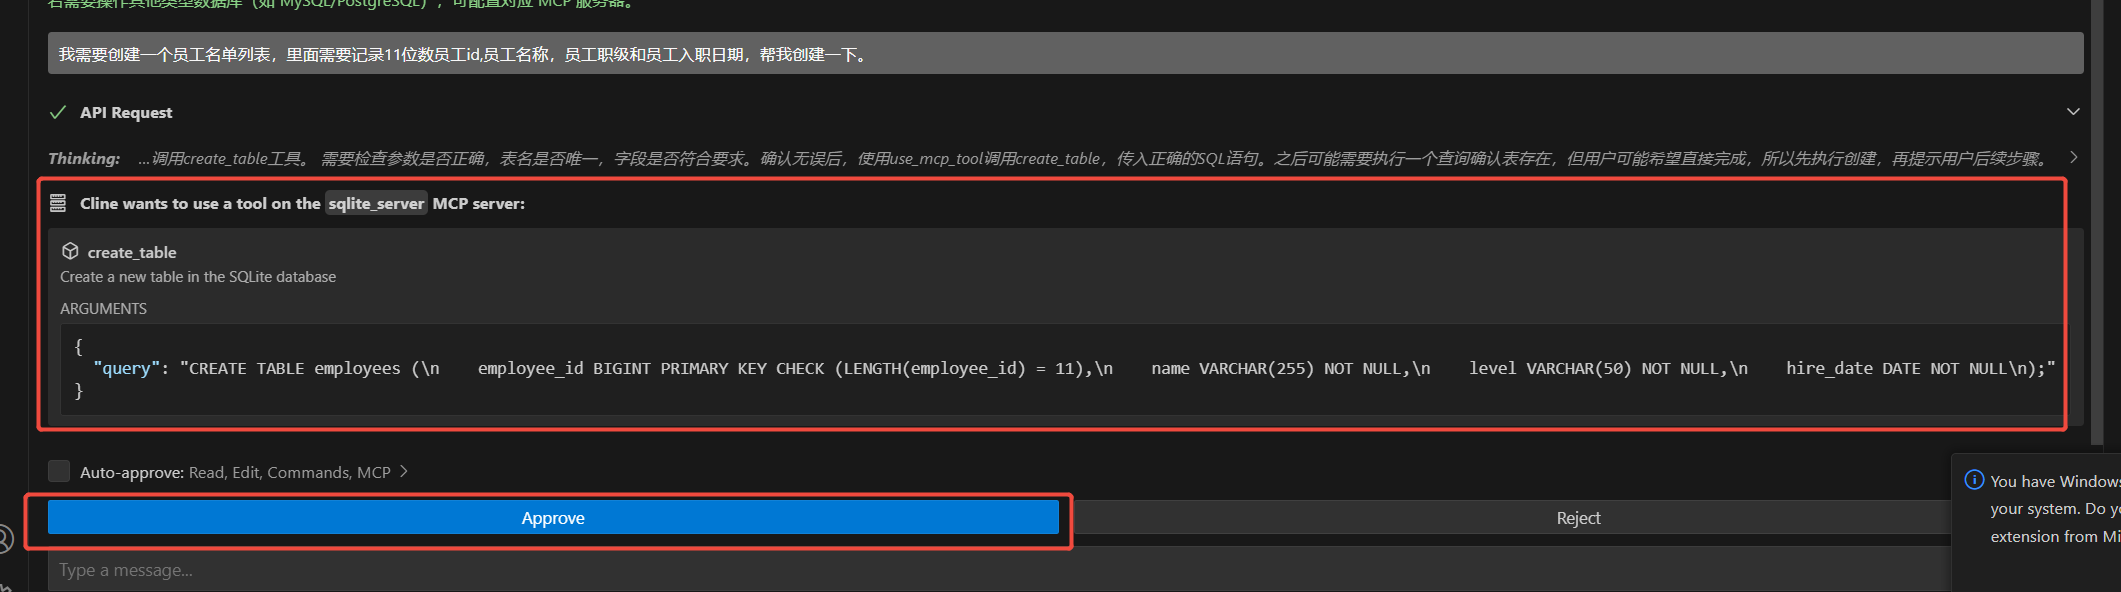
This creates a table for storing data.
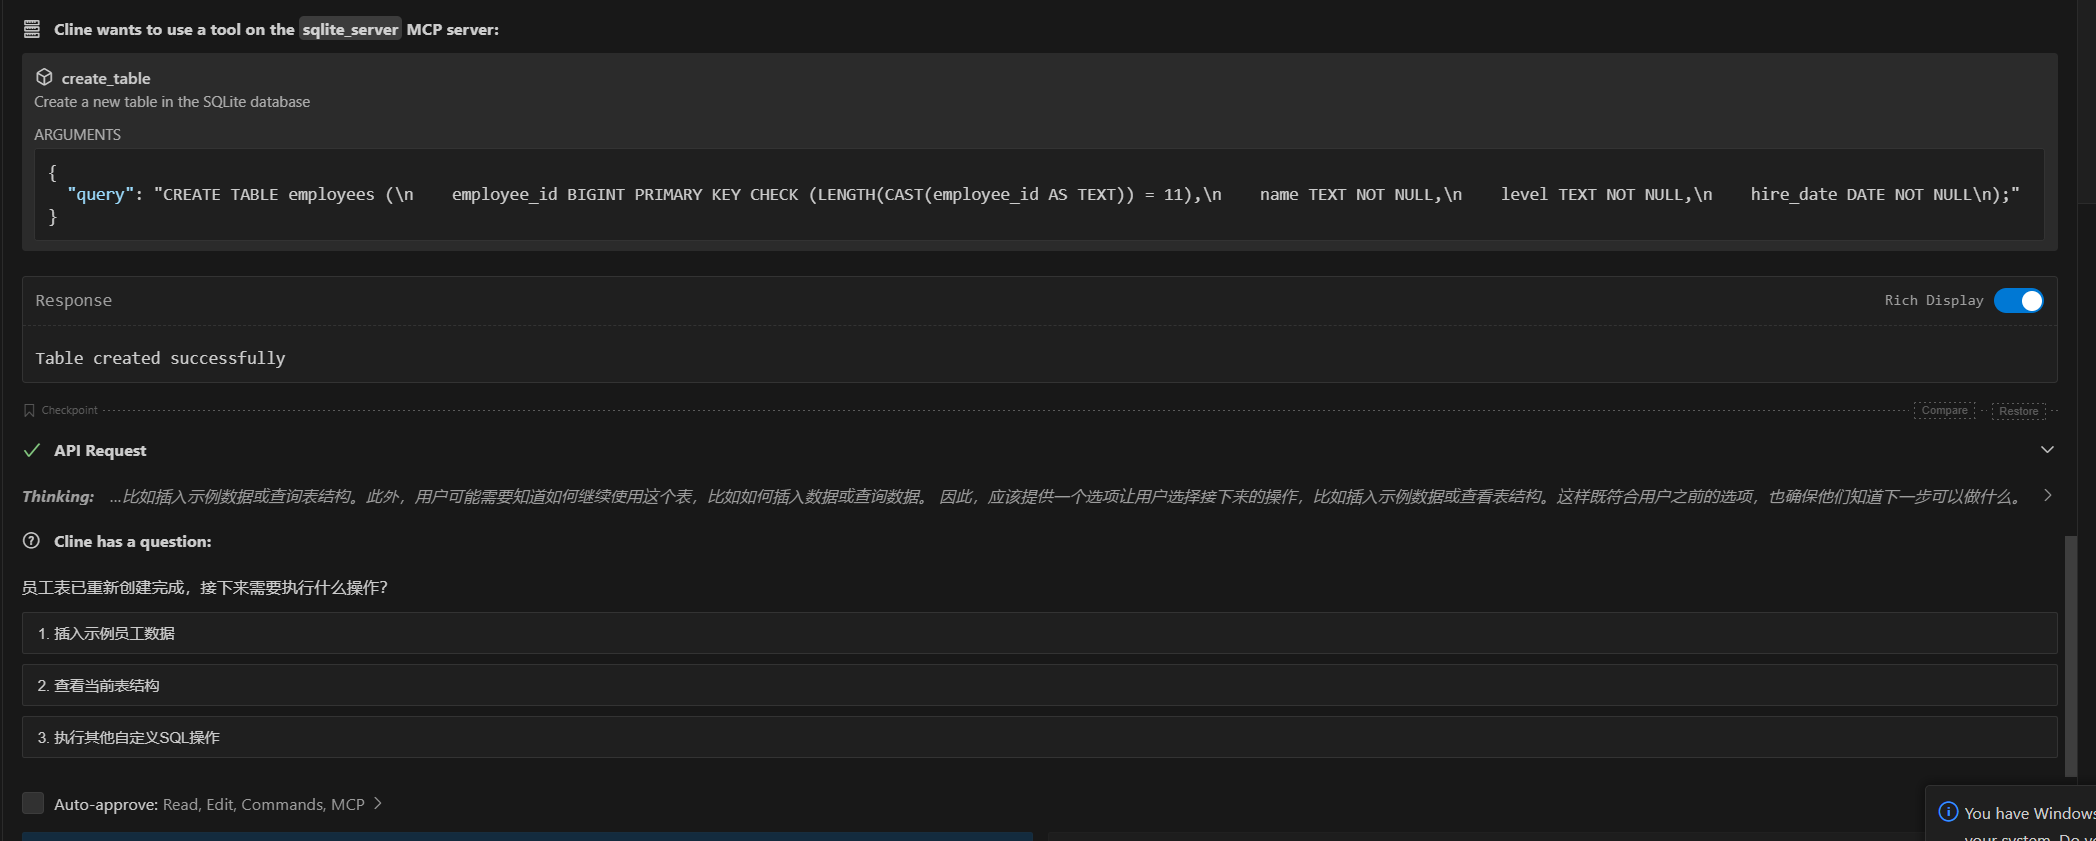
Insert Random Sample Data
Help me generate 20 random employee samples. I need to check if the table meets expectations.The model requests to execute the insert command. Choose to approve.

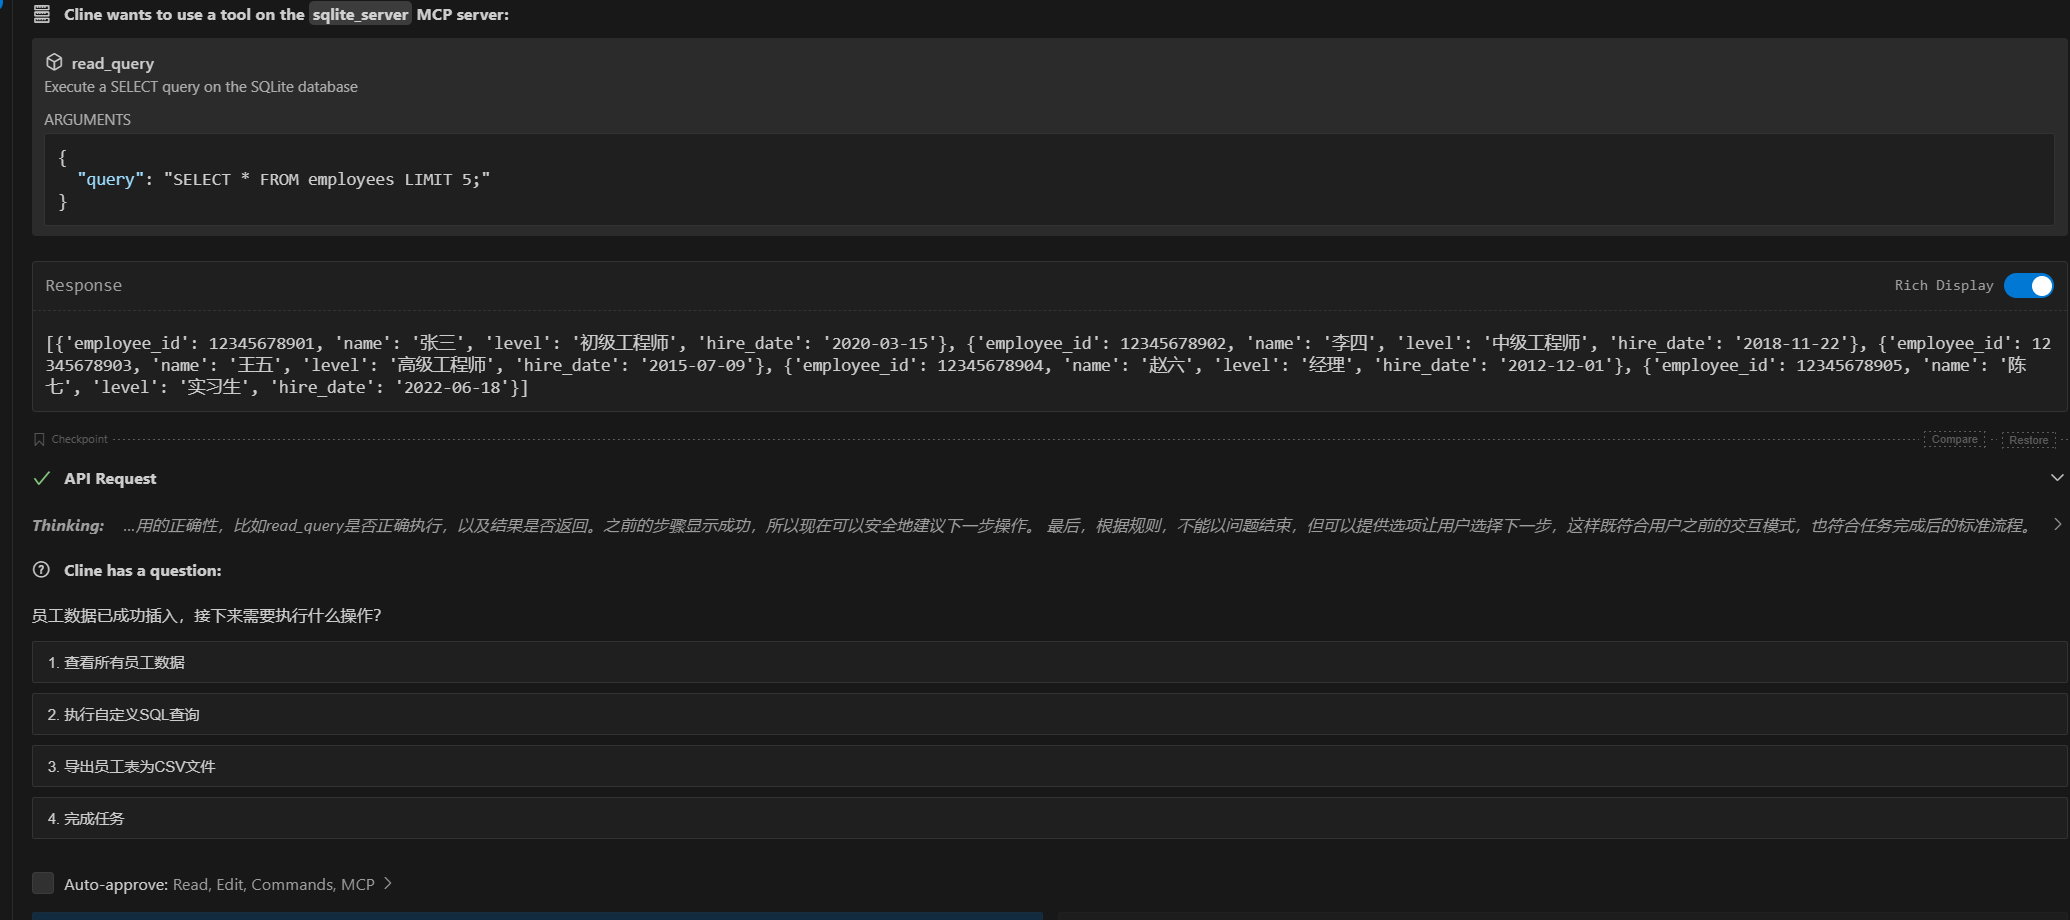
The model requests to execute the select command to check if insertion was successful. Choose to approve.
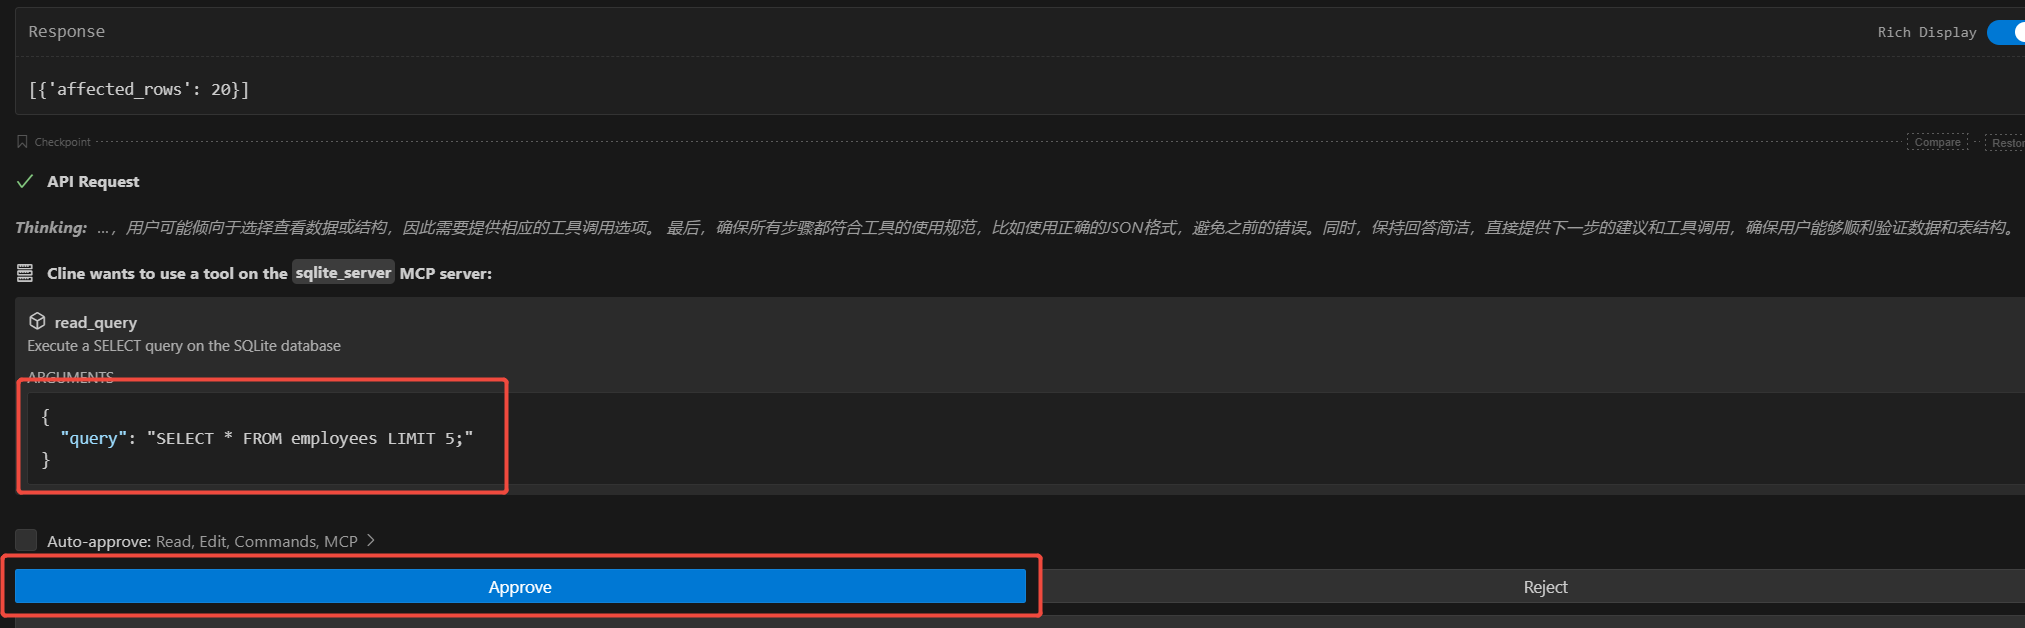
After the model completes the select command, you can see that the random data was successfully inserted into sqlite, and the task is complete.
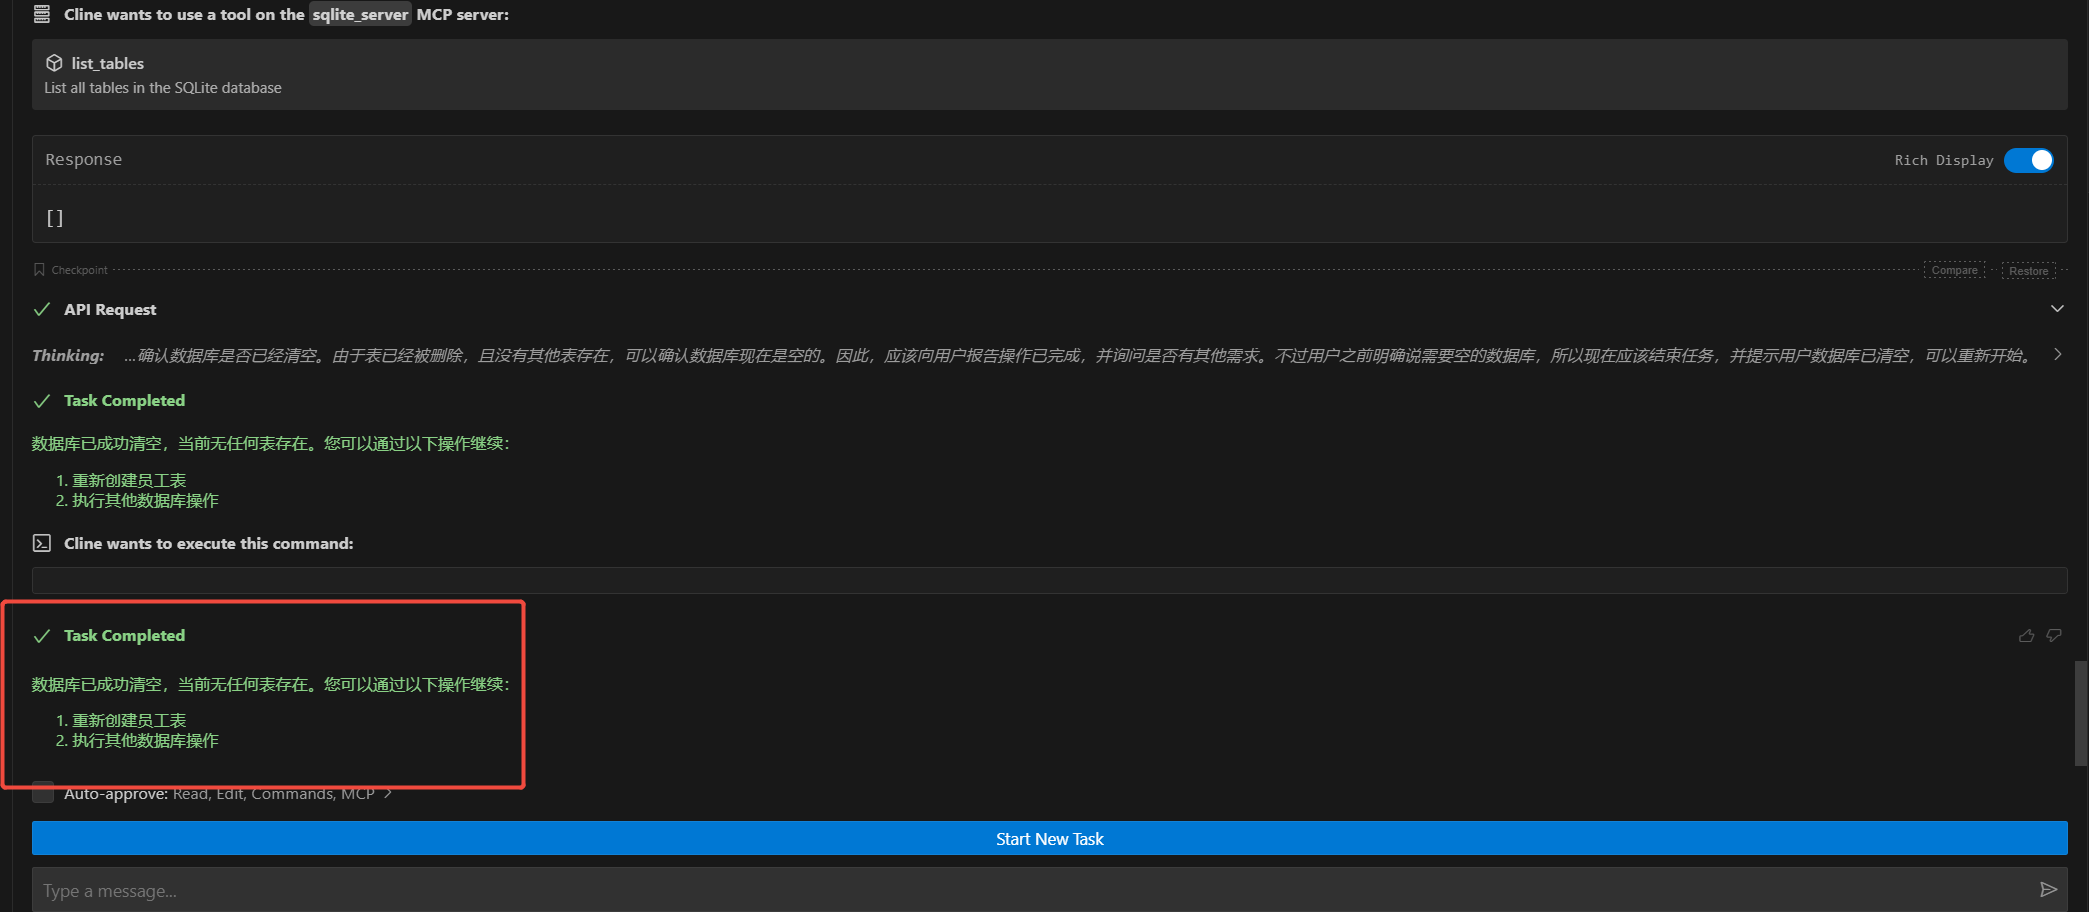
Clear Data
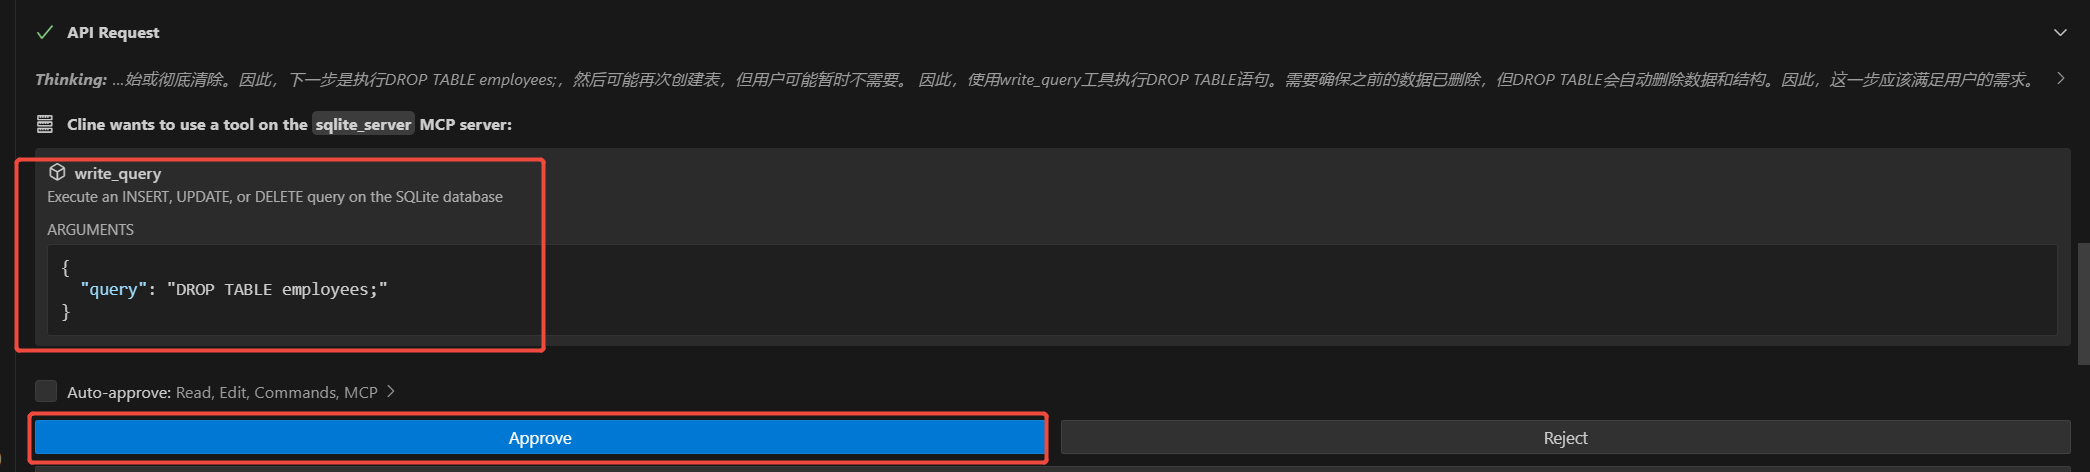
Help me delete the data and the list. I need an empty database.The model requests to execute the command to delete the list. Choose to approve.
The model requests to execute the list viewing function. Choose to approve.
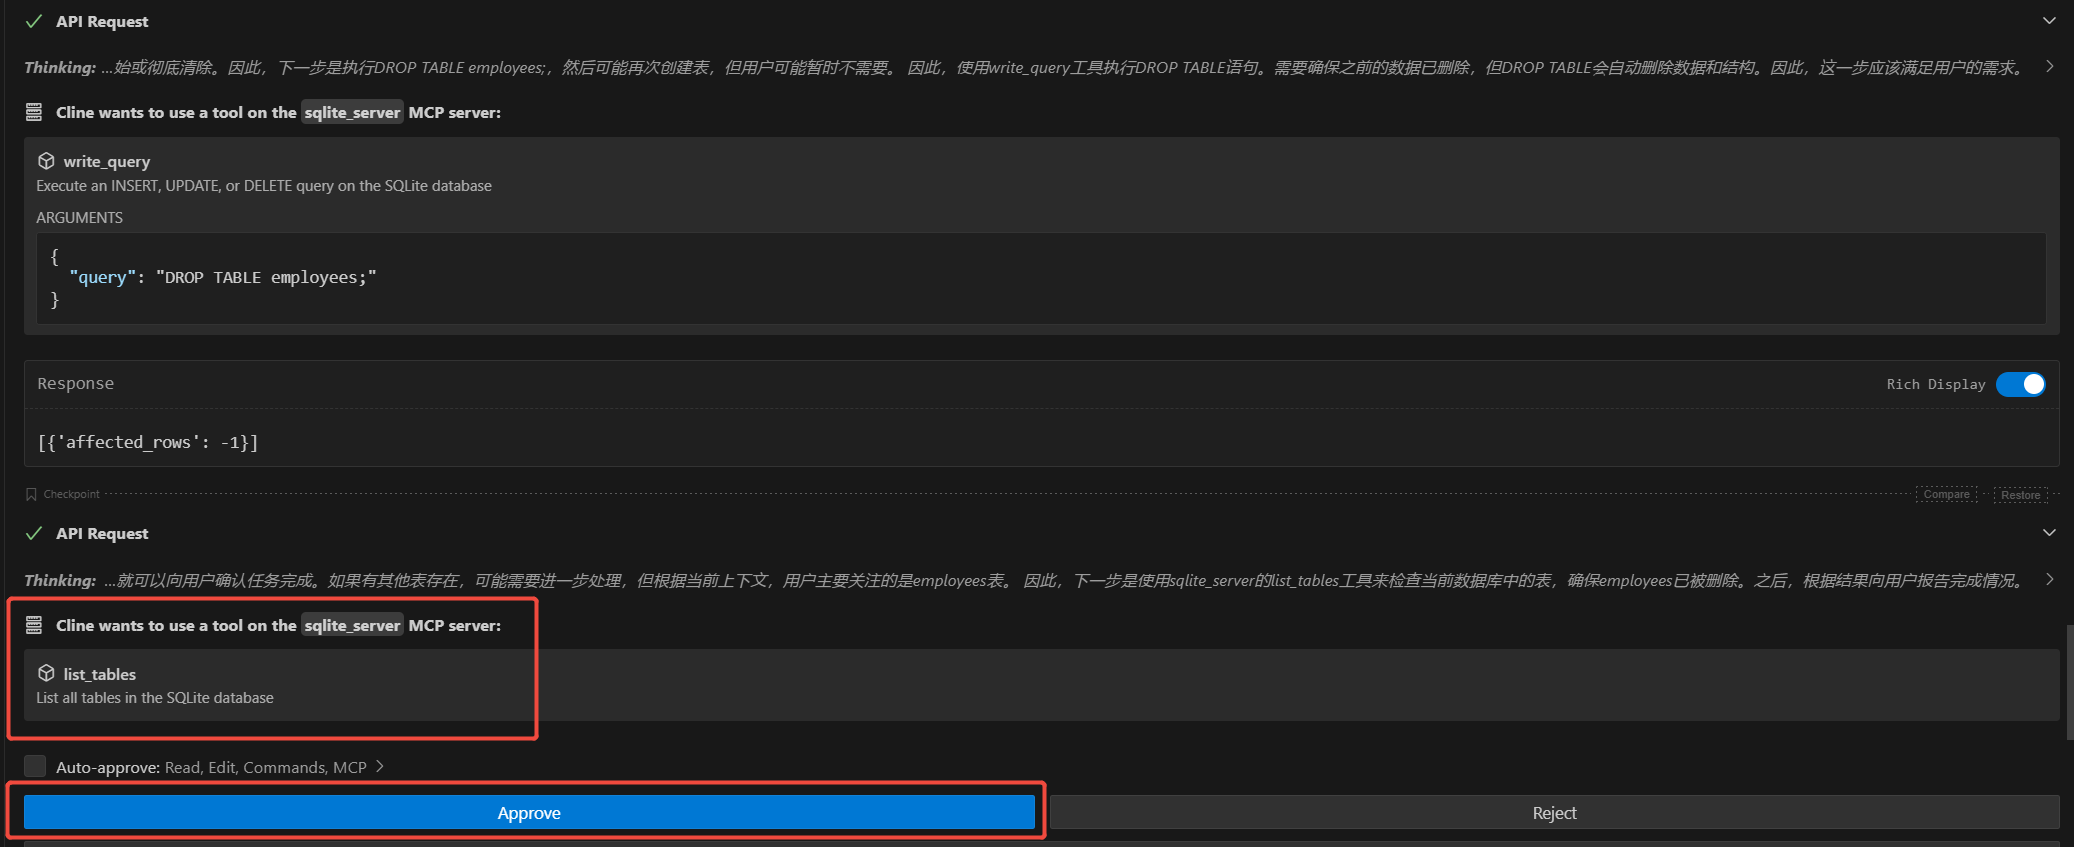
The model confirms that the data has been cleared, and the task is complete.